
We will receive a commission if you make a purchase through our affiliate link at no extra cost to you. Please read our disclosure policy for more information.
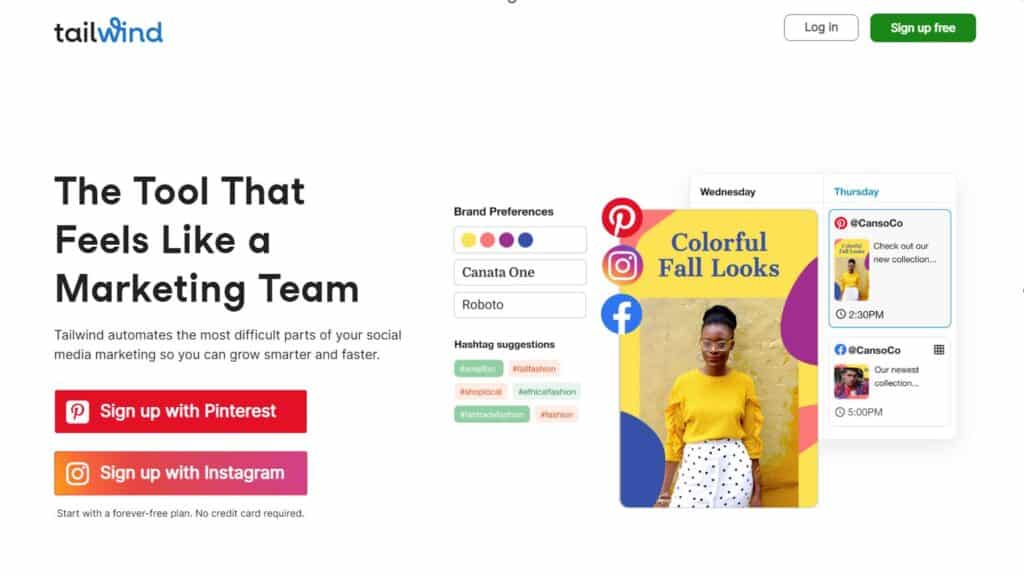
If you’re a Pinterest content creator or blogger, you may have heard of Tailwind – an app that allows you to schedule and publish your Pins so it gets seen on Pinterest by Pinners.
You may be wondering how Tailwind can help you with your Pinterest strategy.
As a blogger who has previously published blogging income reports, I frequently receive lots of questions not only about turning blogging into a full-time job and boosting pageviews on Pinterest but also about how I use Tailwind for Pinterest traffic.
So, in this post, I’m going to share how the app works and how you can start using it to grow your blog or business.
As you may already know, I love to use Pinterest for blogging by scheduling my pins (it’s how I make money on Pinterest), so Tailwind is a must-have investment for me!
What I love about Tailwind is it can help you, or your VA, save time on your Pinterest marketing efforts. Instead of manually pinning every day, or using the Pinterest scheduler in your Pinterest business account (which only allows you to schedule up to 14 days), you can use Tailwind to schedule your pins in advance for months.
This means that you can spend less time on Pinterest overall, and more time working on other aspects of your business or blog. For me, that’s spending more time on creating content, engaging with my readers, testing, and implementing new affiliate marketing strategies, and so on.
If you’re somewhat new to Pinterest and want to learn how to explode your pageviews or increase your overall blog traffic, I have this free 7-day course called Skyrocket Your Pinterest in 7 Days here that will show you how. These are the strategies I used to increase my blog traffic from 0 to over 100,000 monthly pageviews, and in my free Pinterest traffic course, I share some of my secrets with you. 🙂
Can you schedule posts on Pinterest?
Yes, you can schedule posts on Pinterest, and one of the most popular tools for this is Tailwind. Tailwind is an official Pinterest Partner, and it streamlines the process of planning and automating your pins.
With Tailwind, you can set specific times and dates for your pins to be published, ensuring they go live when your target audience is most active. This tool also shows your analytics, so you can assess which pins perform best and refine your strategy accordingly.
Beyond individual pins, Tailwind’s Communities feature allows collaboration with other users, increasing your content reach. While Pinterest itself offers a native scheduling feature, Tailwind’s advanced capabilities and insights make it a favored choice for many content creators and marketers including myself!
What is Tailwind for Pinterest?
You can think of Tailwind is like a personal assistant for your Pinterest account. It helps you schedule your pins for the best times, so you don’t have to do it manually.
You can plan a whole bunch of pins at once, and Tailwind will post them for you over time. It also lets you join groups of other Pinterest users where you can all share each other’s pins — this feature is called “Tailwind Communities” and it’s the main reason why I use the Tailwind app.
Plus, Tailwind has features to show you how your pins are doing and what you could do better. Basically, it’s a handy Pinterest tool for anyone who wants to get the most out of their Pinterest, without spending all their time on it.
How To Use Tailwind for Pinterest Business Users
Pre-scheduling your pins could help you automate or even increase your Pinterest traffic if you are consistently pinning regularly. Like any social media or platform, Pinterest wants you to be active, so you must be pumping out new content and pins for them!
Not only can you save time from manually pinning, but Tailwind also offers some features that are not available on the Pinterest platform itself.
For example, Tailwind Communities are groups of like-minded people who share content. This is a great way to get your pins seen by other content creators, who will share your pins when you share theirs too! This allows everyone to increase their brand awareness in addition to getting more traffic when you are sharing each other’s pins. It’s a win-win for both sides!
PIN (OR BOOKMARK) THIS PAGE: I’ll be updating this post so make sure to pin this image and save it to your Pinterest board. That way you can come back to this detailed tutorial about Tailwind and learn how to use it to increase your Pinterest traffic.
If you want to be able to schedule your pins days, weeks, and months in advance to save time from manually pinning on Pinterest every day, then read on! I’m going to show you how you can use Tailwind for Pinterest to automate your blog traffic.
GET A FREE TAILWIND TRIAL: If you’re interested in trying out Tailwind for your Pinterest marketing, you can sign up for a FREE trial here with my link. This link will also offer you a FREE $15 Tailwind credit if you decide to purchase a plan. Once you’ve signed up, you’ll be able to connect your Pinterest account and start scheduling pins.
Is Tailwind free for Pinterest?
Before you can learn how to use Tailwind for your blog and Pinterest account, you first need to sign up for Tailwind.
Yes, you can get started with a free Tailwind account, however, the features are very limited when you’re on the free version. It’s pretty frustrating because it only allows you to schedule 20 pins per month, which is not enough, and won’t make any significant impact.
As mentioned earlier, you must be active and consistent on Pinterest, so I recommend pinning at least 3 to 5 Pins daily whether it’s your own Pin or another creator’s Pin.
You may think pinning a minimum of 3 to 5 pins daily is a lot of work, but it isn’t when you have pre-made eye-catching Pinterest Canva templates like the ones here. They are the exact Pin Templates I use to streamline my blogs to bring over 100,000 monthly page views to each website!
Having that said, you can always start with the free plan and see how you like the Tailwind platform before committing to a monthly or annual plan. If you are expecting to get a lot from the free Tailwind plan, then you are in for a surprise because it won’t be helpful unless you manually pin on the Pinterest platform, or upgrade your Tailwind plan to schedule more pins into the Tailwind queue.
Tailwind Pricing: How Much Does Tailwind Cost?
For those of you with only 1 website, you can start with the lowest-price plan, which is the Pro Plan. This is only $9.99 per month when you pay $120 annually upfront (otherwise it would be $19.99 per month). So, by paying the full up-front cost for the year, you are saving 50% which is $120!
Under the Pro Plan, you get 1 Pinterest profile with 100 posts per month (that’s on average 3-4 pins per day) if you schedule your posts one month in advance, 5 Tailwind Communities, and more. With Tailwind Communities, you can collaborate with other content creators by sharing each other’s pins. This is one way to increase your traffic in the long haul when more and more people start sharing your posts and pins through Communities.
I use the Advanced Plan, their most popular plan because I find value in having unlimited access to as many Tailwind Communities as possible. The Advanced Plan is only $19.99 per month when you pay $240 upfront (otherwise it would be $39.99 per month). Again, by paying upfront for the entire year, you save 50% which is $240!
SPECIAL BONUS: You can click this link to get a FREE Tailwind trial along with a $15 credit which you can use if you choose to upgrade your plan. On top of that, when you sign up using my link, you’ll be given a welcome bonus where you can purchase the Pro Plan and double your number of posts! In other words, instead of 100 posts per month, you’ll get 200 posts per month! That’s equivalent to 6 to 7 pins per day (compared to 4 to 5 pins per day without the bonus offer), which is more than enough pinning each day. With that many pins published, Pinterest will consider you as a business user who is active on the platform.
Creating a Tailwind Account
Now that you know the difference between a free and paid version, let’s get started on helping you sign up and using Tailwind as a first-time user. This tutorial will work for both a free and paid account.
Step 1: Sign up with Tailwind by connecting it with Pinterest.
Again, you can use this special link to sign up for a free account and ensure you get a $15 credit along with your welcome bonus if you ever decide to invest in a Tailwind plan.
Click on “Sign up with Pinterest”.
Step 2: Enter your email and password associated with your Pinterest account.
If you forget your password for Pinterest, just reset it.
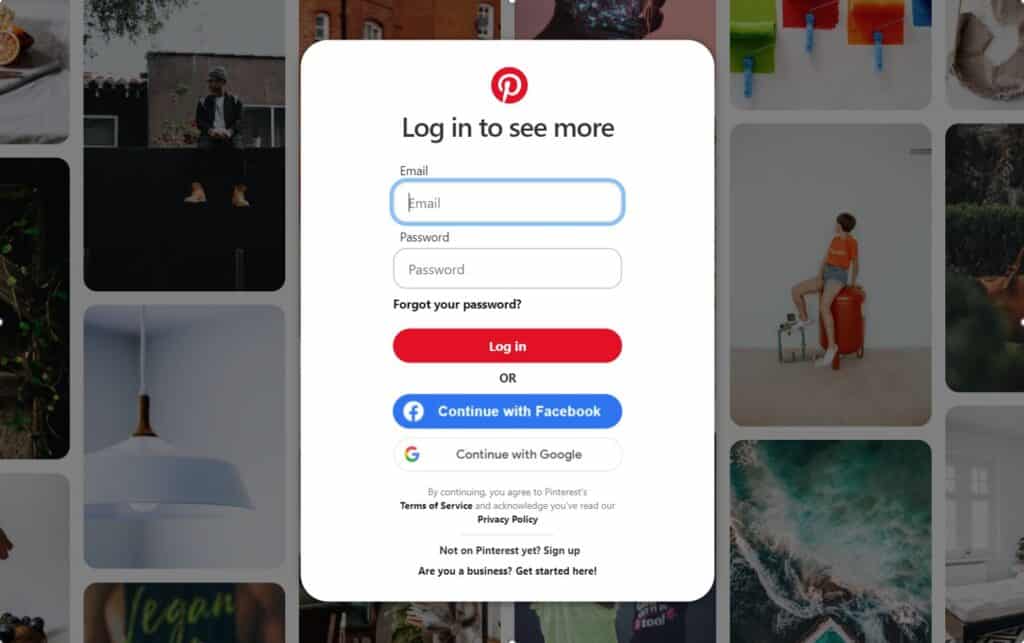
Once you input the correct password, click on “Give Access”.
Now, you can wait for 5 to 10 seconds as Tailwind connects to your Pinterest account.
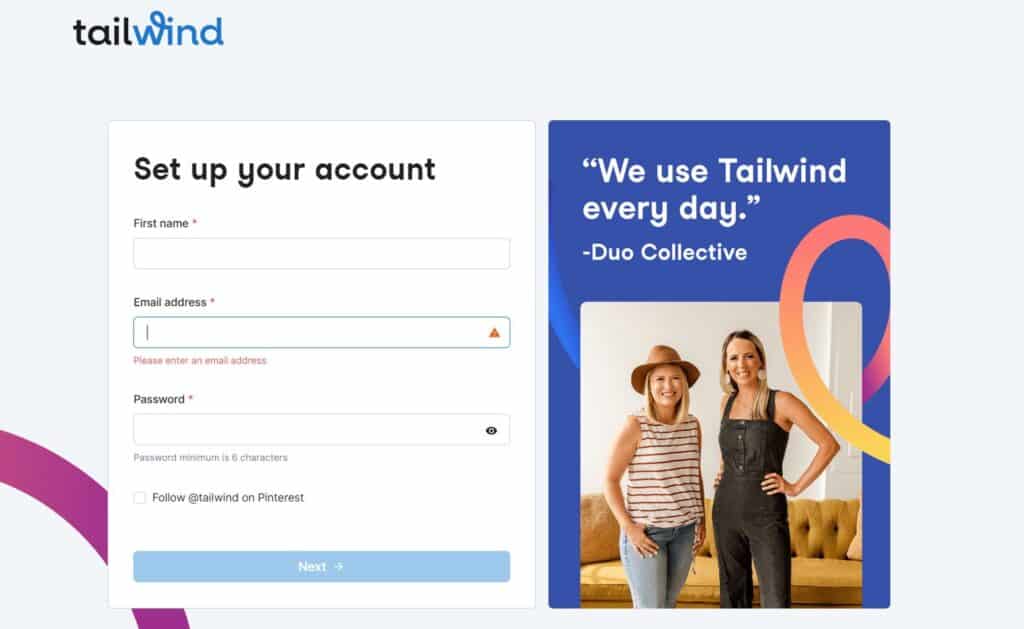
Step 3: Setup your Tailwind Account.
After connecting to your Pinterest account, you will see a screenshot like the one below. Here, you can enter your email address and password.
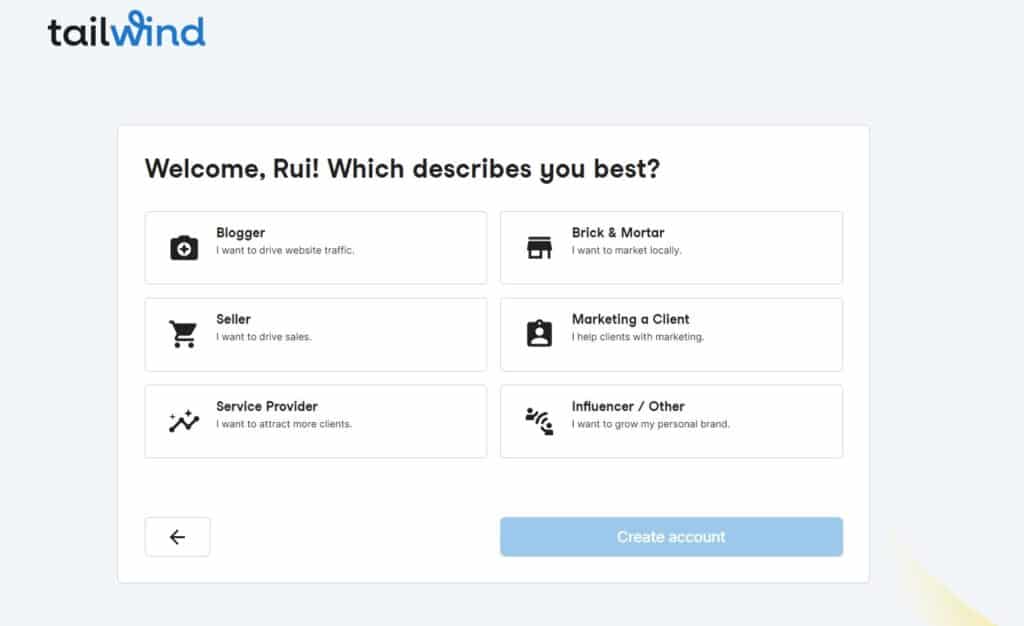
Step 4: Answer the question, “Which describes you best?”
Once you’re in, you can choose what best describes you. I personally chose “Blogger” for my case.
Then, you can click on “Create Account”.
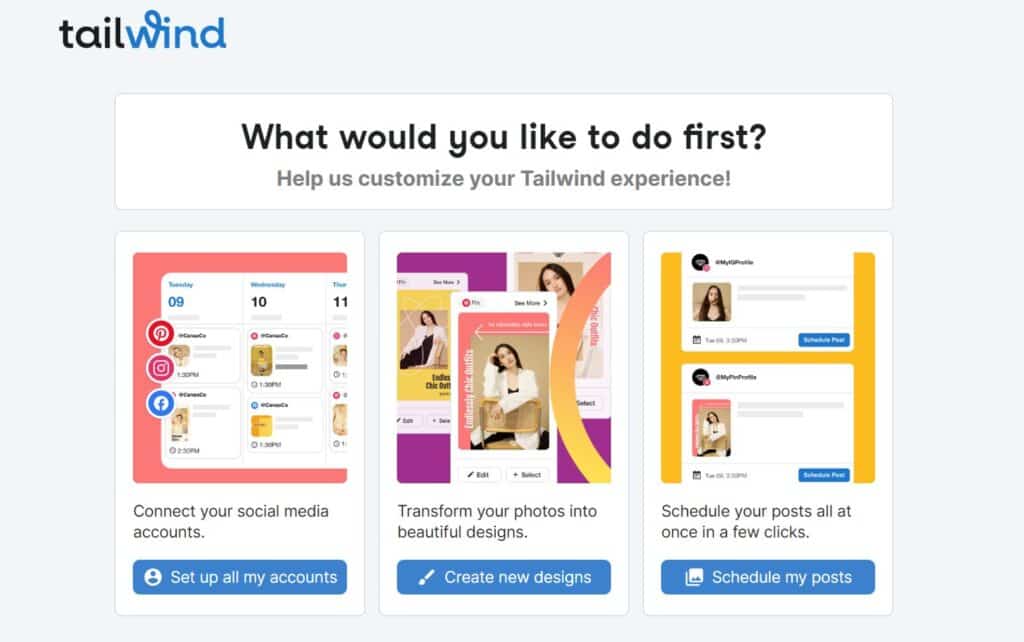
Step 5: Set up your Tailwind account.
Select “Set up all my accounts” to move on to the next step.
Once you’re in, this special bonus pop-up may appear.
They will give you a special welcome bonus like this when you use this link to create your Tailwind account here.
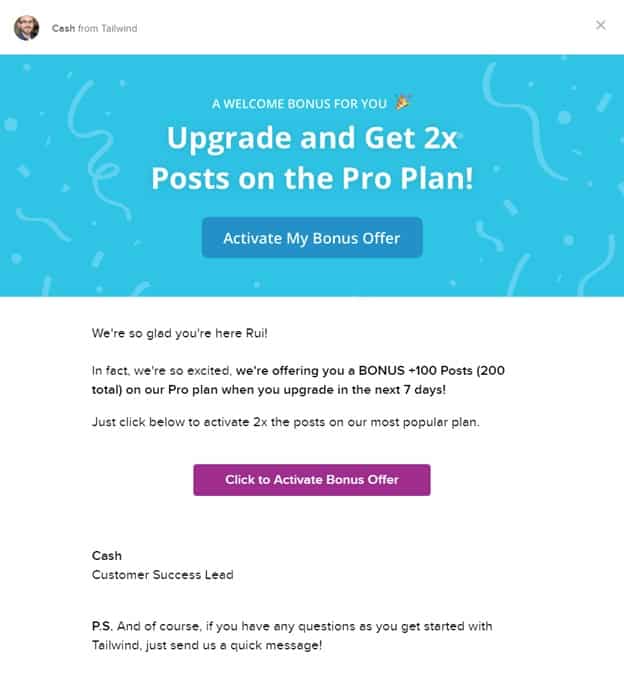
Even if this pop-up doesn’t appear, you will receive the bonus offer when you upgrade your Tailwind plan within your free account.
Congratulations, you now created a Tailwind account! We can go through the next step by step tutorial, which will teach you how to schedule posts and pins for Pinterest using Tailwind!
How To Schedule Using Tailwind for Pinterest
As I mentioned, I am on the paid plan for two of my blogs, but I had to create a new free Tailwind trial account aside to make this tutorial. What I see on the dashboard of my paid accounts will be slightly different from the free version.
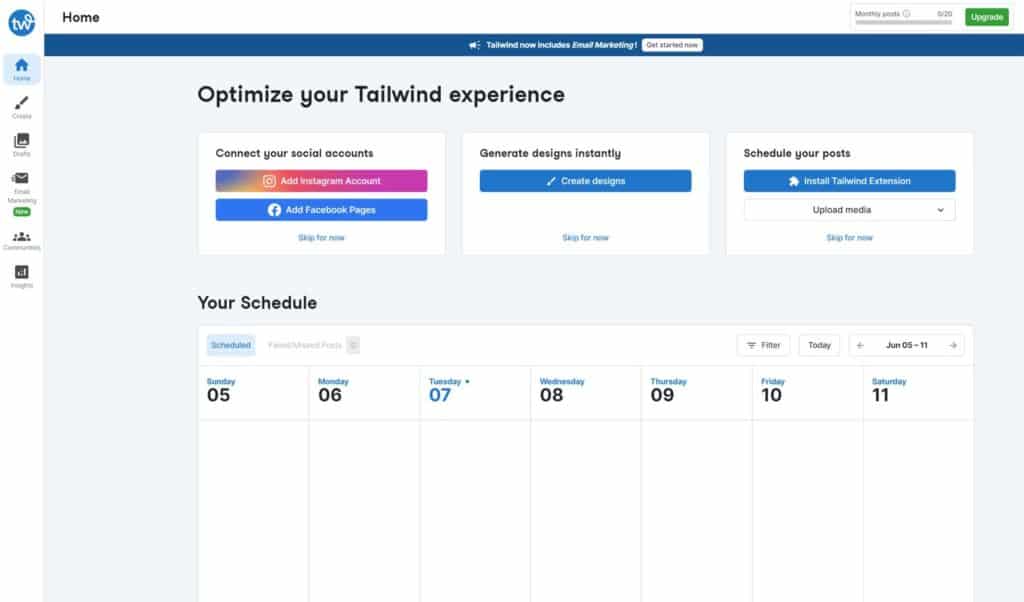
Step 1: Log into your Tailwind account.
Once you’re logged in, your home page will look something like this:
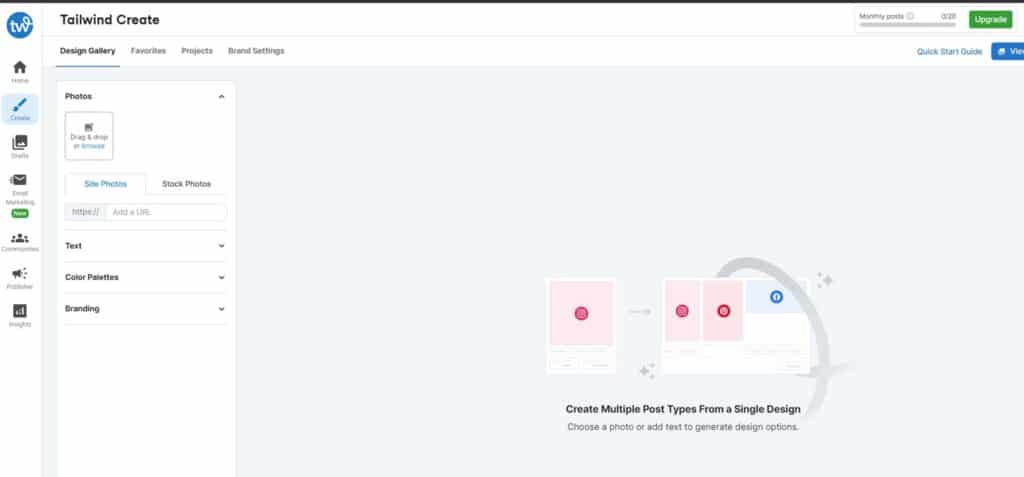
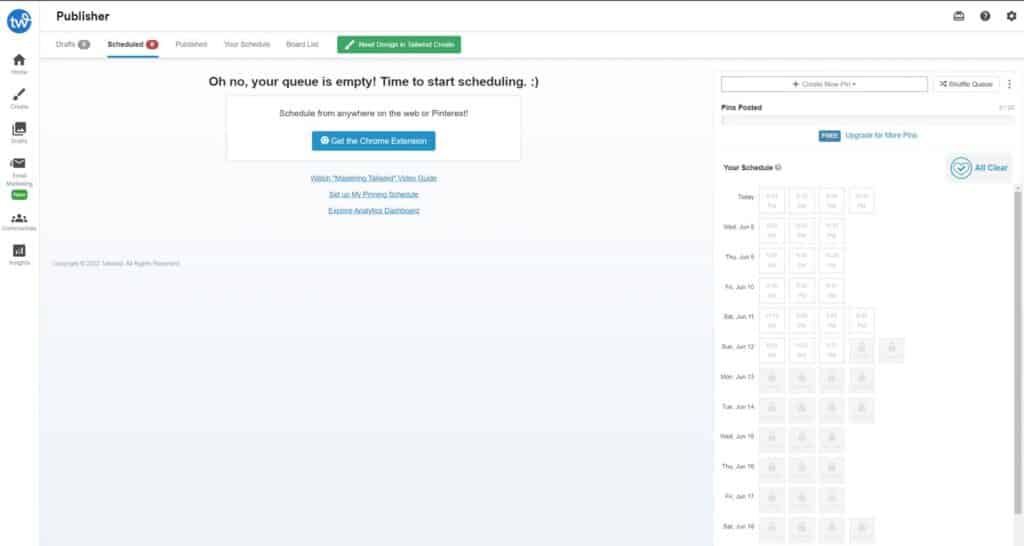
Step 2: Go to Publisher on Tailwind.
Go click on “Create” and then click on “Publisher”.
Note: In the paid account, it will be called “Original Publisher” instead of “Publisher” and it’s easier to access this from the paid account. In the free account, you always have to click on “Create” before you see the icon for “Publisher”. This is where you can schedule your Pins for many future dates.
As you can see, the free account only allows you to post or pin a maximum of 20 per month.
You will need to upgrade to a paid Tailwind Plan if you want to post more. This is why I recommend taking advantage of their welcome bonus because it provides you with a bonus of an additional 100 posts on top of the standard 100 (that’s 200 posts in total).
You can also get started with this free $15 credit and use it towards the Pro plan.
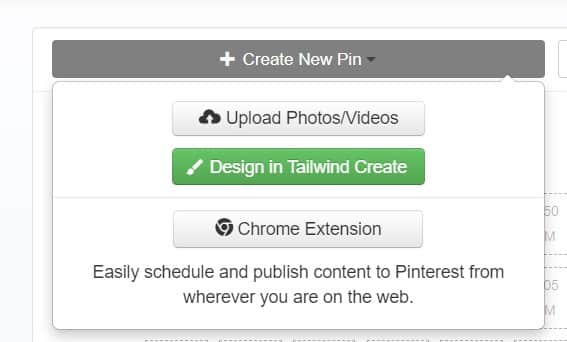
Step 3: Upload your pins from your drive.
To move onto this section, I am assuming you have already created your Pins on Canva and have them saved on your PC.
On the top right, you’ll see a button called “Create New Pin”. Click on that and select “Upload Photos/Videos”. This will allow you to select your Pin to schedule into the Tailwind queue.
You can select as many Pins as you like to upload, or you can do it one at a time. Here is an example when I select two Pins to upload onto the Tailwind platform.
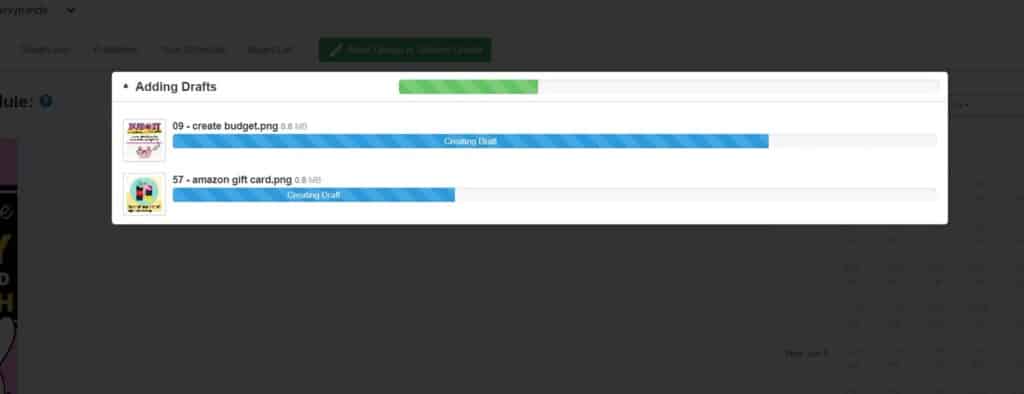
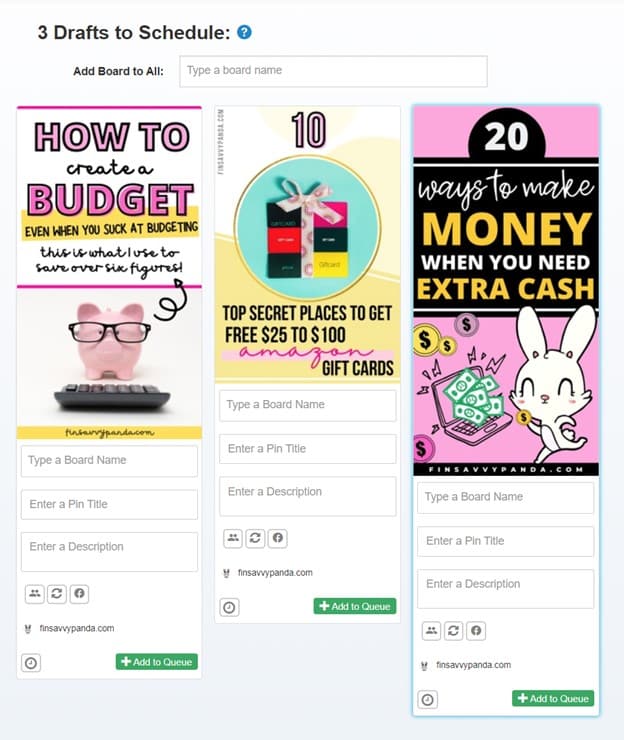
Next, I am going to use 3 pins as an example, so this is what your dashboard will look like when you have uploaded 3 pins.
Step 4: Complete the blank fields in your pins prior to scheduling them on Tailwind for Pinterest.
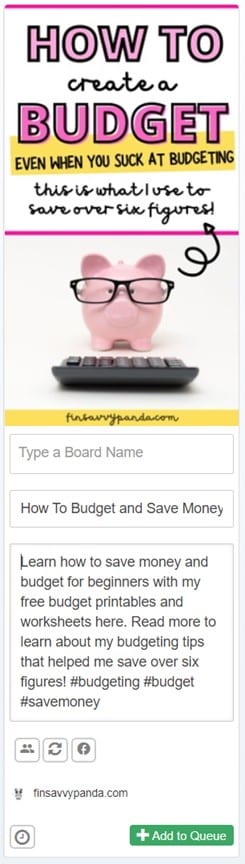
Now that your pins are uploaded onto Tailwind, it’s time to fill in the Pin title in addition to entering your description about the Pin.
You will also select the relevant Pinterest board that you want to publish this pin on. Finally, you will input the URL to your blog post. You can see that my fields are empty right now, but let’s use one of these as an example to help you visualize how to do this. I am going to use my Pin, How To Create a Budget, as an illustration. By the way, these Pin templates that I made are available for purchase here. It works for any blog niche you can think of, plus it comes with my e-book guide on how to use and design eye-catching pins to increase your Pinterest traffic and click-in rates!
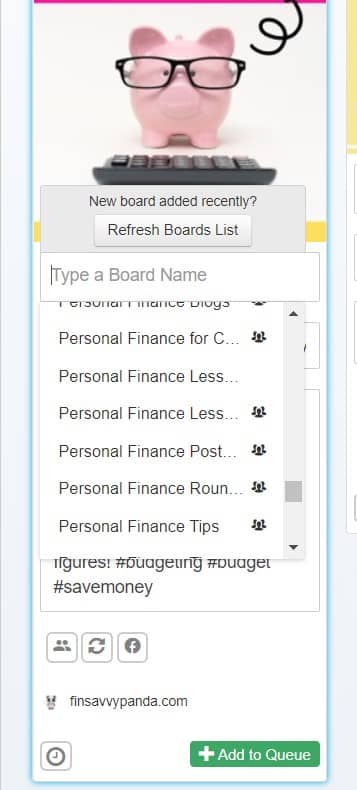
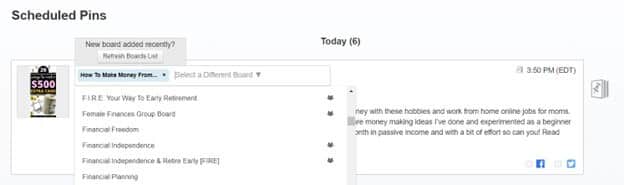
You have the choice to type your board name or select it from the drop-down.
NOTE: If you recently created new boards on Pinterest, you may want to hit the “Refresh Boards List” to make sure it shows up in your drop down.
Because this Pin is about budgeting, I want to make sure I input it into the proper category, so I would choose any board that is about budgeting, saving money, frugal living, or general personal finance. In this case, I chose to schedule this pin to a board called “How To Save Money”.
Step 5: Schedule your pin on Tailwind.
Before you hit the green light, don’t forget to input the link to your blog post. It’s a common mistake to make so try to keep this in mind. The worst thing that can happen is having your Pin go viral, or it gets a lot of saves, but suddenly people are going to your home page, which is not good.
Now, you can hit the “+Add to Queue” button.
Step 6: Choose the date you want your pin to be published
Looking at the image below, you can see I have around 5 to 6 pins scheduled per day on Tailwind.
Now you can move your pin around within the “Your Schedule” section (on the right-hand side) by holding the pin, dragging it, and dropping it into the slot you want. As you can see in the screenshot below, each slot will indicate a time on a specific date.
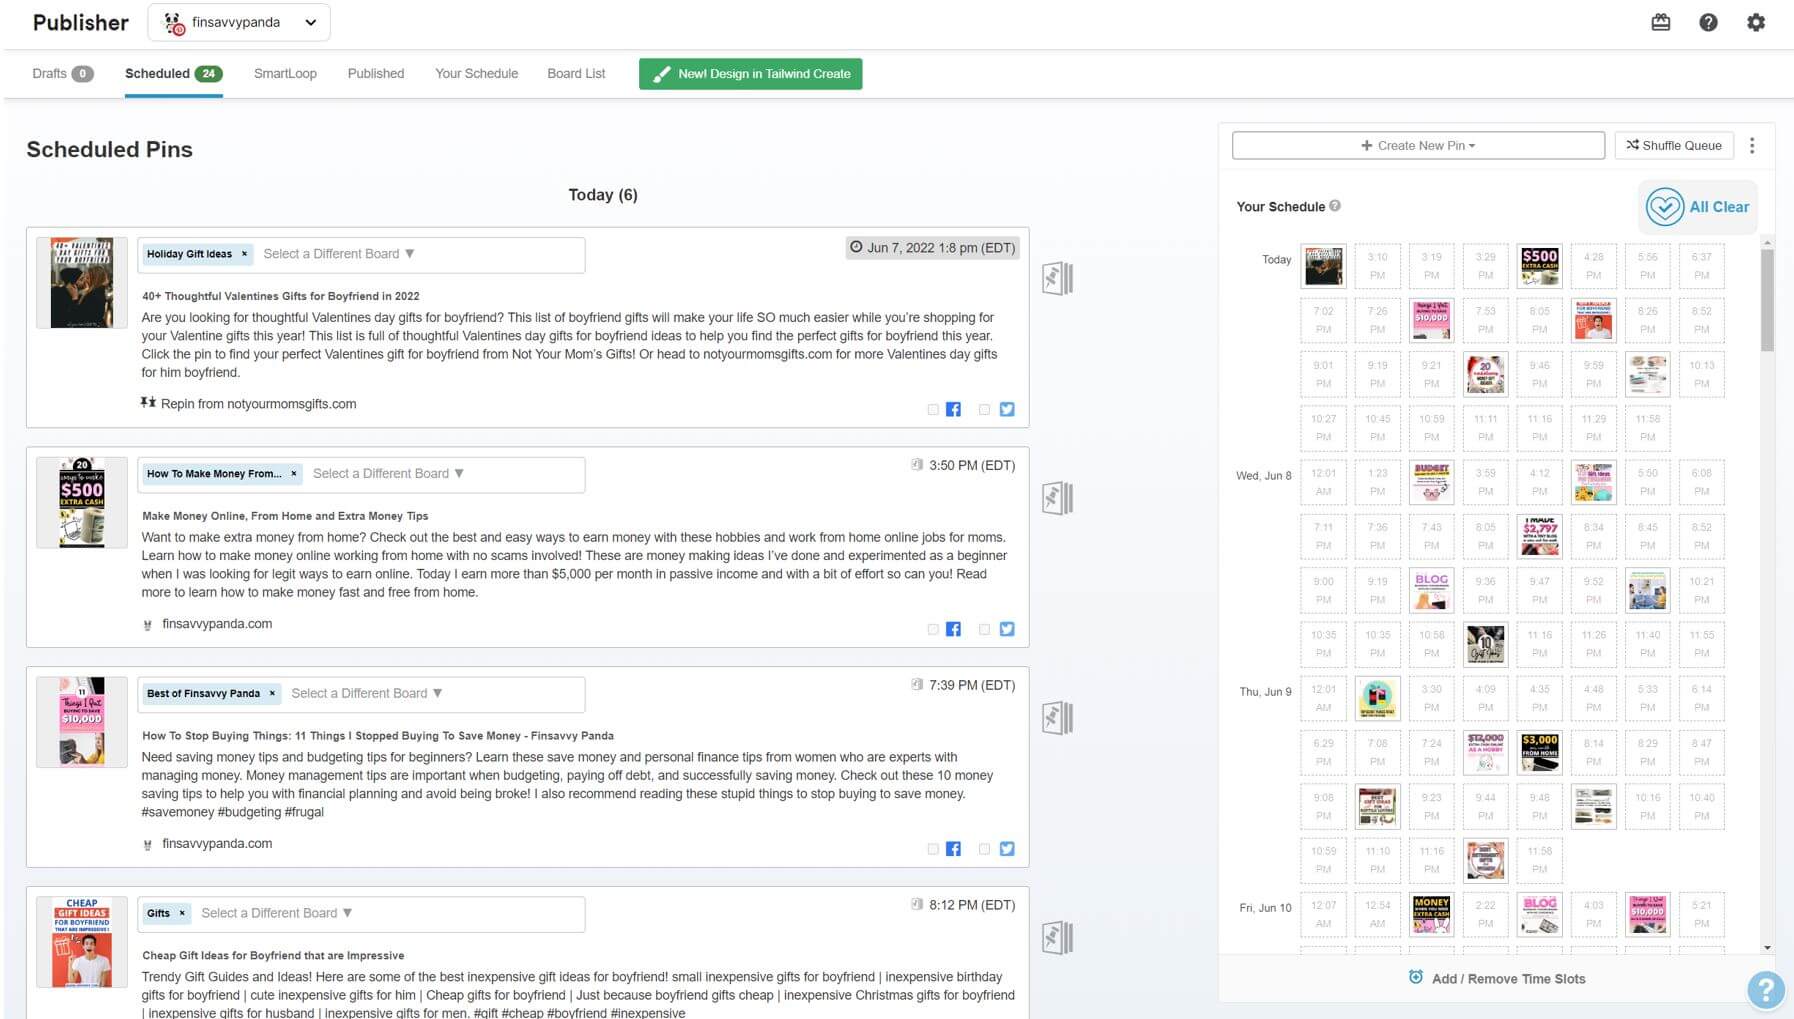
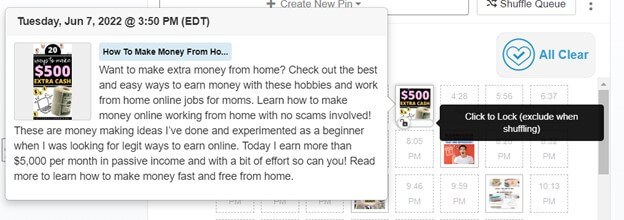
You can also “lock” the pin into each scheduled box by hovering over the pin and clicking on the lock icon, which comes in handy when you are randomly shuffling your pins in the Tailwind queue. I’m going to go into more detail about that in the next section.
Tailwind Shuffle Queue
One feature that Tailwind comes with is the “Shuffle Queue” which is quite handy for some people who don’t want to think about when to publish. In other words, the shuffle feature allows the Tailwind app to randomize the pin scheduling for you.
When you decide to use this function, I highly recommend locking in the pins (mentioned previously) that you want to set a particular date and time for. The shuffle function may be helpful for the pins you don’t care about setting a particular time or date for publication.
I personally prefer to choose specific dates and times for all my pins, so I never use the shuffle function on Tailwind. I admit this takes more time, effort, and brain juice to think about (e.g. thinking about what and what time to pin for particular posts), but I rather am intentional with my pinning than to let Tailwind randomly decide for me.
How To Unschedule a Pin on Tailwind
There may be a time when you want to unschedule your pins.
Here’s how to do it.
Under the same tab, “Original Publisher” or “Publisher”, you can review your scheduled pins on the left-hand side of the screen under “Scheduled Pins” and see if you’re satisfied with the fields. Should you come across something that you don’t like, or need to edit, you can simply hover over the box and click on the “Back to Draft” button.

This will send your pin back to draft mode where you can tweak your fields.
Select a Different Board on Tailwind
Another edit function they have is “Select a Different Board”.
Perhaps you decided to pin this to a different board from what you originally chose. You can easily change that by simply selecting another board.
In this case, the board I wanted to save this pin to is “How To Make Moey From Home” but now I want to pin it to “Side Hustle Ideas”, so I can quickly edit that on the spot without unscheduling the pin or sending it back to draft.
Tailwind Weekly Pinning Schedule
When you first sign up for Tailwind, you’ll notice that you are given 5-6 pre-set time slots on each day to fill. You can quickly change this and/or add more time slots to your Tailwind pinning schedule.
Under the same page, “Publisher” or “Original Publisher”, go to the “Your Schedule” tab.
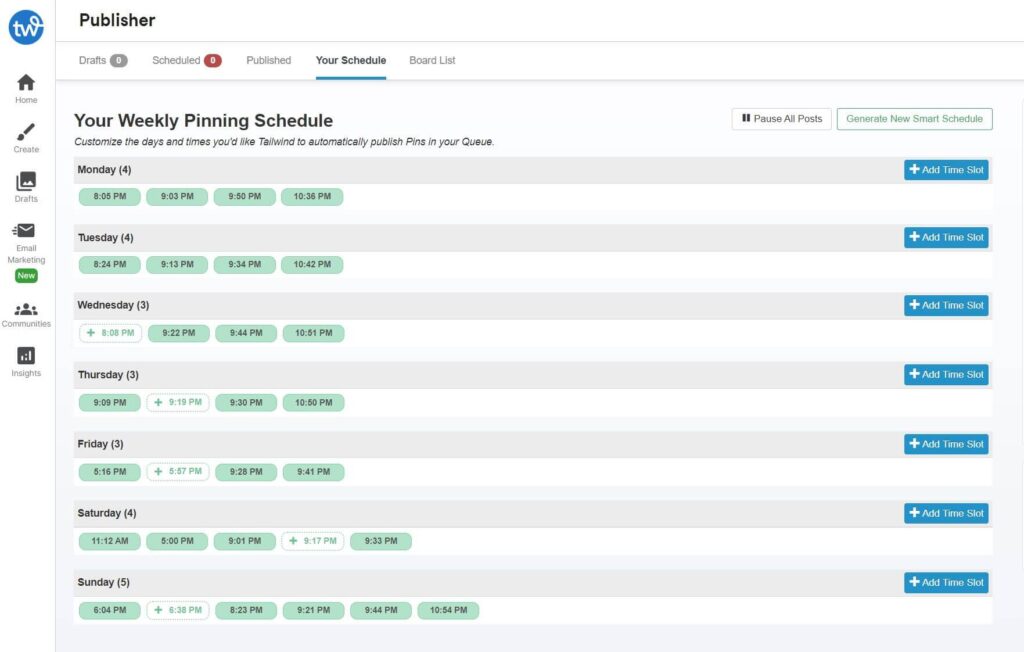
Next, you can click on the blue button, “+Add Time Slot” to allow you to increase the number of pins scheduled per day at the desired times you want. This also allows you to customize the days and times you’d like Tailwind to automatically publish Pins in your queue.
Be sure to set your Timezone on the same page before doing this.
FAQs About Tailwind Pinterest
I never thought I would receive so many emails from my readers regarding the use of Tailwind for Pinterest. To simplify things, I’ve decided to update this post and compile all these commonly asked questions here.
From now on, feel free to leave a comment in the comment section of this blog post and ask your question about how to use Tailwind or anything related to it. Doing so will save me the time of responding individually to everyone via email. This method really helps streamline the process and ensures that I’m able to assist everyone! 🙂
On a side note, I frequently receive numerous questions related to Pinterest and how to increase traffic with it. Therefore, I highly recommend visiting the insightful and valuable posts linked below for more details. From answering common questions like “How long does it take for a pin to show up on Pinterest?” to “Why are my pins not showing up on Pinterest?”, you’ll find what you’re looking for in these articles:
- How to get traffic on Pinterest (The things I do to get over 100,000 monthly pageviews)
- How long does it take to get traffic from Pinterest? (how you can go viral on Pinterest)
- How to use Pinterest for blogging (how to use Pinterest to promote your blog)
1. Is Tailwind really worth it?
As mentioned in this post, Tailwind is a worthwhile investment if you’re looking to save time. It allows you to bulk upload and pre-schedule your pins as far into the future as you’d like.
At the time of updating this post, the native Pinterest scheduler (the one you use within your actual Pinterest business account) permits scheduling up to 29 days in advance with a limit of 100 pins – a significant increase from the previous 2-week period. This is subject to change as Pinterest often adjusts these parameters.
In fact, the Pinterest platform periodically alters its scheduling policies. For instance, there were times when you could pin two months in advance, but still with a 100-pin limit.
This inflexibility with the native Pinterest scheduler (again, the one that comes with your Pinterest business account) is one of the reasons why Tailwind is so valuable! It allows you to schedule as far ahead as you want without imposing a limit on the number of pins you can set up.
For instance, if you want to schedule pins 6 months in advance using Tailwind, and you pin an average of 3 pins a day, you would be pre-scheduling a total of 546 pins for that 6-month period. This number would be even higher if you pin more frequently. Unfortunately, you can’t achieve this with the native Pinterest scheduler due to its 100-pin and 1-month scheduling limits.
Beyond the extensive scheduling feature, I truly believe that Tailwind is valuable for its ‘Communities’ feature. In fact, it was the ‘Communities’ that primarily motivated me to invest in Tailwind.
As noted earlier in this post, it’s a platform where you can collaborate with other bloggers to share each other’s pins.
I’ve observed that when your pins are shared by others, the likelihood of a significant increase in your traffic is much greater than when you simply pin yourself. That’s not to say that you can’t achieve success on Pinterest without using the Tailwind Communities feature.
However, I’ve found it incredibly effective not only in boosting but also in consistently maintaining monthly traffic flow. You can observe this in action with one of my other blogs, which heavily relies on using Tailwind for Pinterest traffic, as shown here:
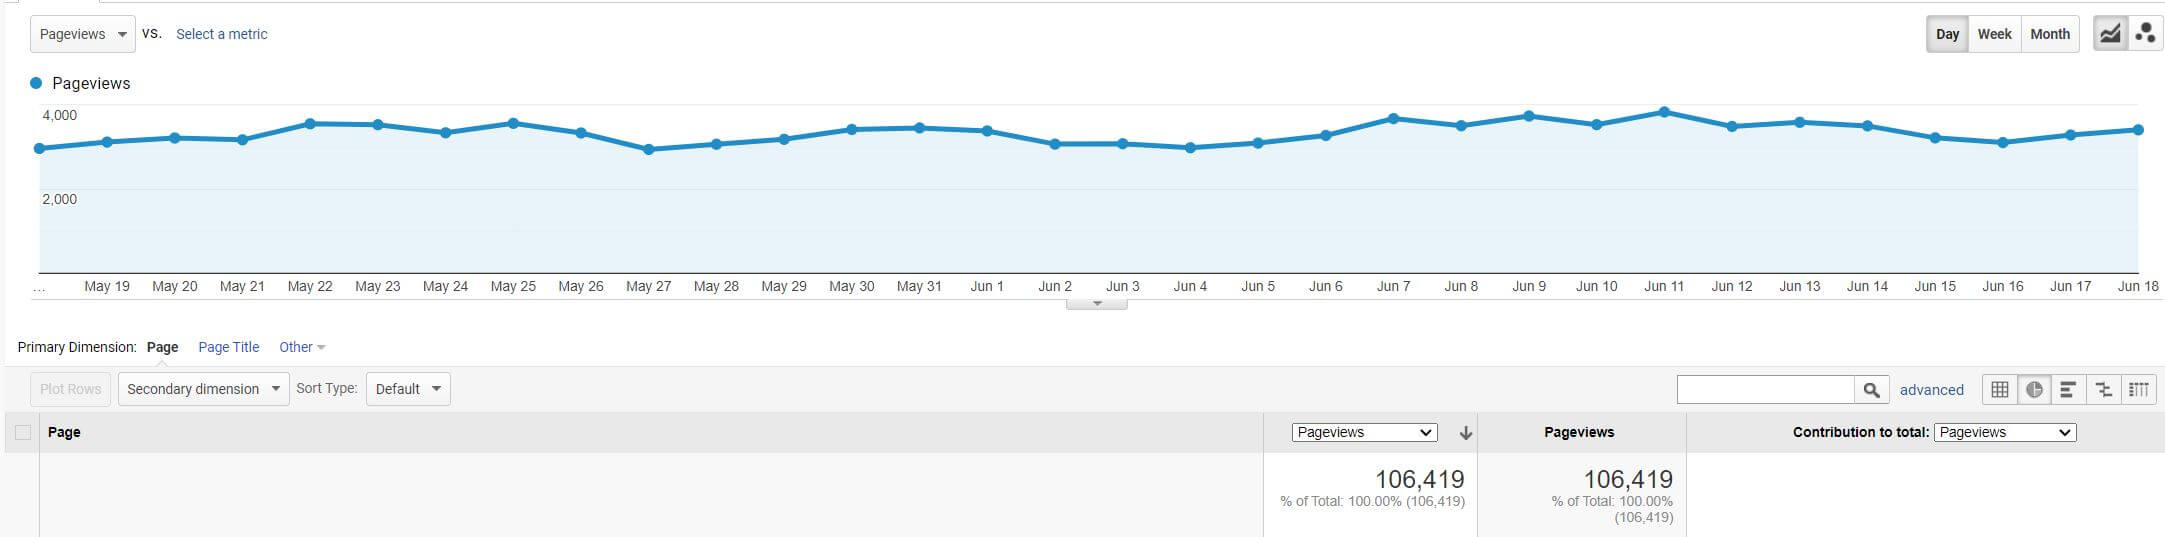
The Tailwind Communities feature is extra cost but I think it’s definitely worth it!
If you wish to try out Tailwind Communities, you’ll need to invest in an actual Tailwind paid plan. I really recommend the Advanced Tailwind Plan here (NOT the Pro Plan) because the “Advance” gives you unlimited access to as many communities as you desire. The “Pro” plan caps you with only 5 Tailwind Communities which is not worth your time. You need to be able to join more communities to make this a worthy investment.
And even worse, the free version of Tailwind also caps you at only 5 Tailwind Communities (just like the paid “Pro” Plan) and doesn’t permit sufficient sharing or uploading of your own content to make it worthwhile. In other words, using the free version or “Pro” plan for this purpose will not be the most effective use of your time. Trust me on this one!
2. Is Tailwind good for beginners?
Yes, Tailwind is excellent for beginners, particularly because when you’re just starting out, you may not have an extensive network of bloggers to collaborate with.
By using Tailwind, and specifically its ‘Communities’ feature as previously mentioned, you’ll gain access to other bloggers in your niche who can share your content. The more your content gets shared, the quicker you’ll be able to boost your Pinterest traffic. Consider it as an investment in a mastermind group where everyone assists each other.
However, in order to receive shares, it’s crucial that you also share other bloggers’ pins. You can’t simply join ‘Communities’ and expect others to share your content without reciprocating. If you neglect to do this, people are unlikely to share your pins, even if you are part of the Tailwind communities. It’s a given that you get what you give.
Furthermore, if you decide to purchase the ‘Advanced’ Plan through my special Tailwind link, please send me an email to let me know. I’ll then share with you the top communities for all the different niches I’m a part of, which you should consider joining for improved traffic results! These are the communities I’ve handpicked and carefully analyzed over the years to determine their worthiness for you to join. This way, you don’t have to waste time figuring out which ones are the best.
Please note, I receive a notification whenever my Tailwind link is used, so I’ll be aware of who has taken this step. It’s important to be honest in this process as inaccurate claims will not receive a response.
3. Is the Tailwind free version enough?
While the free version of Tailwind might provide a good initial insight into what using Tailwind for Pinterest is like, it’s not sufficient to significantly increase your traffic. This is due to the limited number of Communities you can join.
With my other blog, I didn’t even try the free version. I had already experimented with the free version for FinSavvy Panda when I first started using Tailwind, but I quickly found myself needing to upgrade to the ‘Advanced’ account due to the limited features of the free and even the ‘Pro’ account. I would recommend opting for no less than the ‘Advanced’ plan.
Again, I will share with you the top communities that I’m a part of when you use my Tailwind link to purchase the “Advance” Plan. These are the communities that are more active and more likely to boost your traffic.
Conclusion on How to Use Tailwind for Pinterest Traffic
If you’re a content creator, then you know the importance of promoting your content on social media or search engines. And if you’re looking for a new way to promote your content, then you should definitely consider using Tailwind for Pinterest.
As mentioned, Tailwind is a tool that allows you to schedule and publish your content on Pinterest. It’s super easy to use and it can help you boost your content’s reach especially when you take advantage of their feature, Tailwind Communities. I mentioned this feature in my post about how long it takes to get traffic from Pinterest, and I love using Tailwind Communities because is a great way to build up a following and traffic on Pinterest.
Overall, Tailwind is a great way to save time on promoting your content on Pinterest. Not only is it easy to use, but it can also help you reach a wider audience. If you’re looking for a new way to promote your content, then you should definitely consider using Tailwind for Pinterest today!
I hope you found this tutorial on how to use Tailwind helpful for your blog and Pinterest traffic! If you have any comments or questions, please leave them in the comment box below and I shall answer them.
Hi Ling, i´m currently binge reading all your posts and i was wondering if the Tailwind communities have to be of my same niche to be able to colaborate and share each others post?
Rhianna
@Rihanna – it doesn’t need to be same niche though I think it’s better if it is because you’ll have people within your category sharing related posts. Either way, it works. Try them all and see which one you get best results from! 🙂 Let me know how it goes.
Good stuff, Ling. I am beginning to appreciate Pinterest more each day because things move here and my travel images work nicely on the platform, methinks. Tailwind is proven and setting things up adds a passive element to your blogging strategy. Everyone wins. Saving time is critical for us bloggers; Tailwind helps ya do that, big-time. Excellent post.
Ryan
Ling, as always your articles inspired me. They are so easy to follow and you make it seems so easy. I am glad the day I started your free 7-day course online on blogging for beginners. Your ebooks are awesome. Never disappointed.
Hi Christiline – I am thrilled to hear that my articles about Pinterest and blogging inspire you. I’m also so happy to hear you have followed my course and ebooks!
Your blog is looking great so far and I am excited to see you make progress. By the way, I’m loving the way your logo looks – it’s so well crafted!
So looking forward to seeing you grow your healthy living and lifestyle blog – it’s going to help so many people craft a better lifestyle! 🙂
Keep me posted on how your blog is coming along and continue to create new content by optimizing your posts and focusing on keyword targeting mentioned in my eBooks. I’d love to see you achieve your first 1,000 to 3,000 visitors!